As a videographer, you know just how important of a role light plays in the quality of the wedding clips you create for clients. Thus, today’s set of wedding video tips will focus on the different kinds of light and how they can be used creatively.
Generally speaking, light can be divided in two main varieties – soft and hard. Preferring one over the other isn’t just about personal aesthetics. Both varieties have their qualities and depending on the one that you pick, you will be affecting your wedding videos in a very specific way.
Soft and Hard Light Defined
Before moving on to our wedding video tips that highlight the selection and the use of the right kind of light, let’s make a difference between the two main categories.
What Is Hard Light?
When defining the two varieties of light, you have to take a look at the shadows created by each.
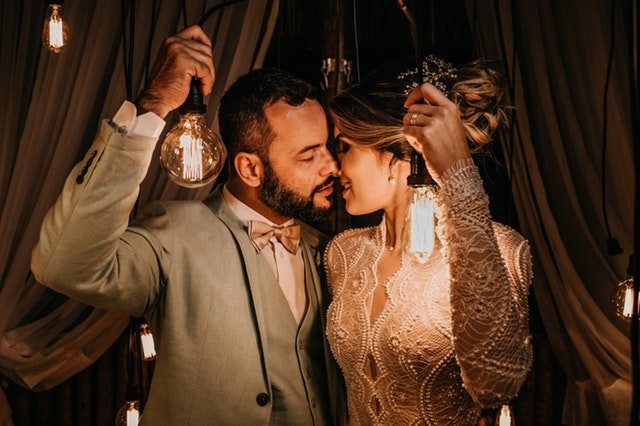
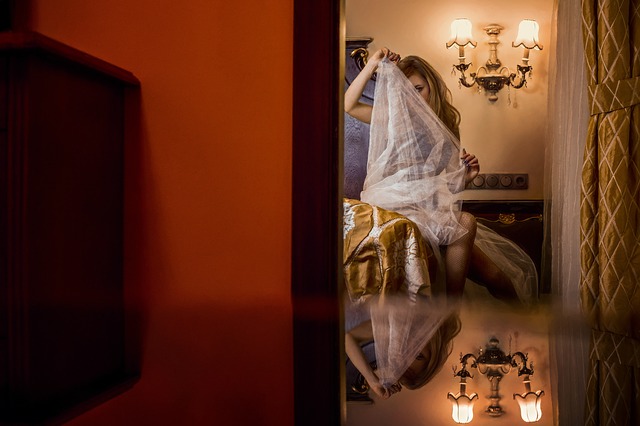
In the case of hard light, there’s an abrupt transition from light to darkness. The shadows are clearly defined and discernible. Because of this characteristics, hard light is considered a high contrast kind of light.
Hard light usually produces a dramatic visual. It can heighten the mood and it can make the details pop out because of the contrast.
Because of these characteristic, hard light happens to be the option of preference for portrait photography. At the same time, hard light has some negative characteristics.
Since it puts so much emphasis on the detail, the imperfections also become clearly visible. Video outcomes when hard light is being used tend to be really textured and ornate. In some instances, this is not a desirable effect.
In addition, the use of hard light can result in a technical problem. It is known for creating highly illuminated spots that appear overexposed. Thus, the correct placement of light is very important to achieve a balanced, highly dramatic outcome.
What Is Soft Light?
Soft light is the exact opposite of hard light. The transition from lightness to shadows is gradual. The final outcome looks a lot softer and it lacks the dramatic appeal of scenes illuminated with hard light.
In many instances, these characteristics of soft light produce various visual benefits.
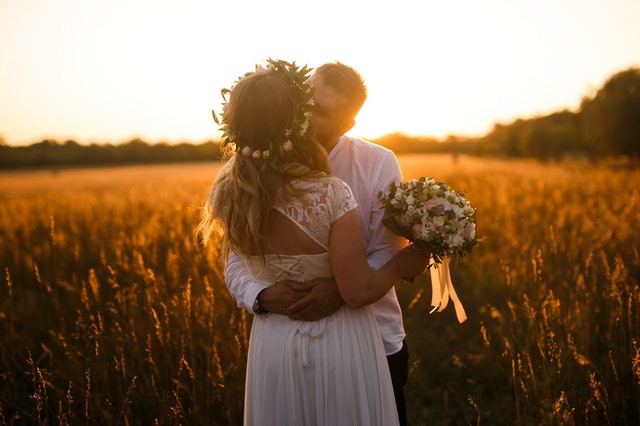
Golden hour portraits make use of soft light. While the contrast isn’t as defined, there is still detail and the visual looks rich and saturated. In addition, soft light covers up many imperfections to result in smoother and more balanced composition.
Creating flattering visuals is easier when you’re relying on soft light. You will also have an easier time in terms of projector and external light placement. Soft light, however, can never give you the dramatic outcome you’re going to get when using hard light.
Characteristics That Determine the Hardness or Softness of Light
So, which features contribute to lightness or softness?
There are several determining factors, the most important ones being the placement of the light, its distance from the subject/object, the size of the light source and the intensity of the light. Notice that there is no link to whether you’re using warm or cold light. Hardness and softness are different concepts.
As a general rule of thumb, you should remember that the bigger the light is, the softer the outcome produced.
Thus, an external flash will be considered a small light source. When placed close to the bride and groom, it will create hard light that’s dynamic and very contrasting. To soften things up a bit, you will need to use a diffusion umbrella.
An intense hard source produces hard light and the same applies to a light source that’s placed very close to the subject/object.
You can modify all three of these components to experiment with light and change the level of drama throughout the wedding video you’re shooting.
Professional Wedding Video Tips: Creating Beautiful Visuals with Soft and Hard Light
This is where the fun begins – you can completely transform a scene through a simple change in light.
Experienced videographers know exactly what source of light to use and where to place it to “extract” the most from a single scene. This is the reason why various professional wedding video tips focus on experimenting with lights.
In order to make the most of the venue and scene, you need to bring a number of different light sources. Going to the venue in advance to check out what the available lights are will also help you make up your mind.
As already mentioned, unmodified camera flashes create hard light. They’re small, they’re intense and they’re very near the subject. Keep in mind, however, that controlling hard light to produce the exact visual you have in mind can be challenging.
Moving the flash off camera allows for more flexibility. You can place the source nearer to have some harshness or pull it back and increase the softness of the scene.
Thus, a projector may be a much more versatile piece of lighting equipment for wedding shoots.
To produce soft light, you will need to use some sort of modifier, especially if you don’t want to be moving equipment around all the time.
The aim of the modifier is to increase the surface area. Remember – a bigger light produces a softer outcome than a smaller and highly concentrated one.
An external projector is easier to soften but you can modify the on-camera flash, as well. Small diffusers and soft boxes are readily available for placement on the camera. They diffuse the light without the need for using a larger umbrella.
Bouncing the camera light off a surface before it reaches the subject is another way to get a softer outcome. The light can be bounced off a wall or even the ceiling. When it reaches the subject, it will be diffused and subdued.
Finding Hard and Soft Natural Light
The real mastery here is using natural light to get the hard or soft finish.
For the purpose, you have to carry out the video shoot at the exact time of the day and the right place.
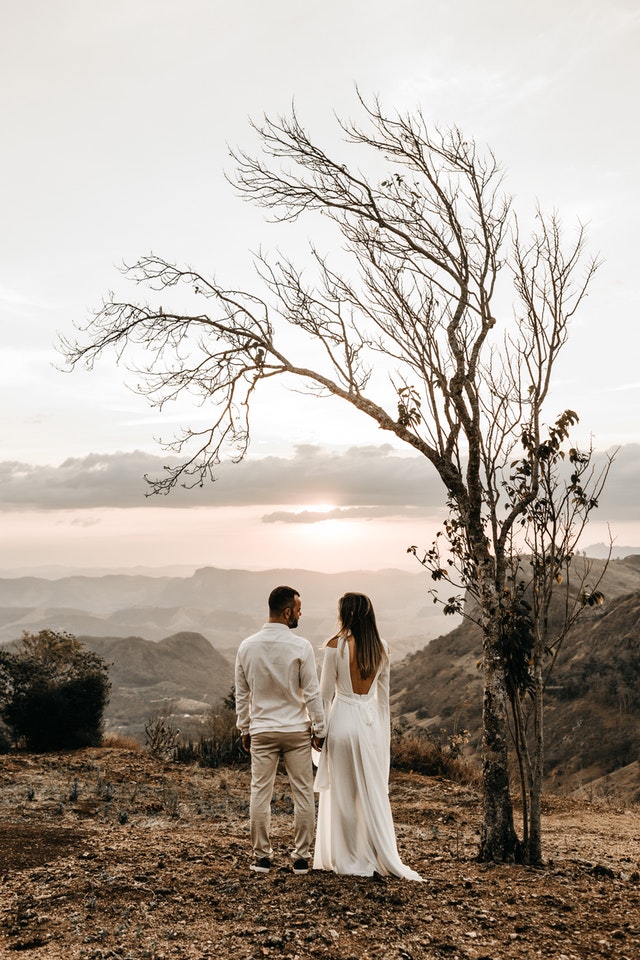
Natural sunlight can produce a harsh outcome on a sunny day. Just avoid shooting at sunset or sunrise because these times are characterised by a ton of softness.
Getting the hard light to fall just right when you’re using a natural source, however, is difficult. You should definitely go for a trial shoot at the exact time before the big day arrives. Ask the bride and groom to move around. Make sure you explore different positions and angles to get a dramatic effect without overexposure. For best results, avoid scheduling a video shoot at noon. The light is harshest at that time and you will find it incredibly difficult to control the illumination.
Soft natural light, as already mentioned, is most readily available in the morning and before the sun goes down.
Clouds also act as a natural diffusion tool and they can decrease the intensity of the sunlight. Thus, check out the weather forecast for the wedding day. It’s possible for natural conditions to be ideal for a soft shoot.
If you have to shoot on a sunny day, choose a shady spot. Having the bride and groom enjoy each other’s company under the branches of a large tree can give you some soft light. In addition, the light filtering between the leaves can produce very interesting effects you can experiment with.
For optimal results, get the bride and the groom to attend a video shoot either shortly after sunrise or before sunset. Both the softness and the colour of the natural light at these times will give you a flattering visual to include in the wedding video.
Final Verdict: Is Soft or Hard Light Better?
The aim of professional wedding video tips isn’t to give you a universal formula you can rely on every single time.
Rather, our suggestions encourage exploration. There isn’t a better option when you’re choosing between hard and soft light. The two can be used to accomplish different things. Thus, the selection of one or the other will depend on your artistic vision and the style that the bride and groom prefer.
The best way to find out which kind of light gives you better wedding video results is to experiment.
Gear up on light sources and diffusers. Schedule shoots at the right time of the day. Play with the positioning, the angle and the placement of the lights. Most videographers do have an illumination method of preference but they’re capable of changing things up to stylistically modify videos.
You now know the theory and the practical ways to change the hardness and the softness of light. Go out there, have fun and do rehearse! If you are prepared for the specific wedding day conditions, you will definitely achieve the result that you’ve envisioned.
Looking for a wedding video editor?
Get a free quote within 24 hours!

A Guide to Organizing Footage for Wedding Video Post-Production
Looking for a wedding video editor? Get a free quote! Wedding video post-production can be an incredibly chaotic process, especially if you have a ton of footage that you’ve failed organizing properly. Organizing raw footage should become an integral part of your...
How to Avoid Burnout as a Wedding Videography or Photography Service Provider
Looking for a wedding video editor? Get a free quote! Burnout affects all professionals during tense periods, but wedding videography and photography service providers tend to be heavily affected during peak season. Being consistent, attending multiple events, taking...

Best Way to Handle Wedding Video Revision Requests from Clients
Looking for a wedding video editor? Get a free quote! Revision requests are a normal, inevitable part of the wedding video editing process. Dealing with exaggerated or unsubstantiated revision requests, however, can take a toll on your business. As a wedding...

Wedding Video Editing for Social Media: A Guide to Reels, Trailers, and Teasers
Looking for a wedding video editor? Get a free quote! Producing the perfect wedding video for your clients is sometimes just the beginning. In a digital age, people often have additional requirements like social media content they can cherish and share with their...

How to Scale Your Wedding Videography Business with Outsourced Post-Production
Looking for a wedding video editor? Get a free quote! The only way to keep your business sustainable is to continue growing and evolving. Unfortunately, many entrepreneurs lack the time and resources to think strategically about growth and implement the steps needed...
0 Comments